
By the time we reach the end of a unit, my students are usually ready for something different. We've spent weeks learning new content, practising skills and working through plenty of activities together. The last thing most classes want is another revision worksheet or a long list of questions copied from the textbook.
That's why this project has become one of my favourite ways to finish a unit. And why I created this dedicated Build Your Own Boadgame Template For Teachers like you to use in your own class.
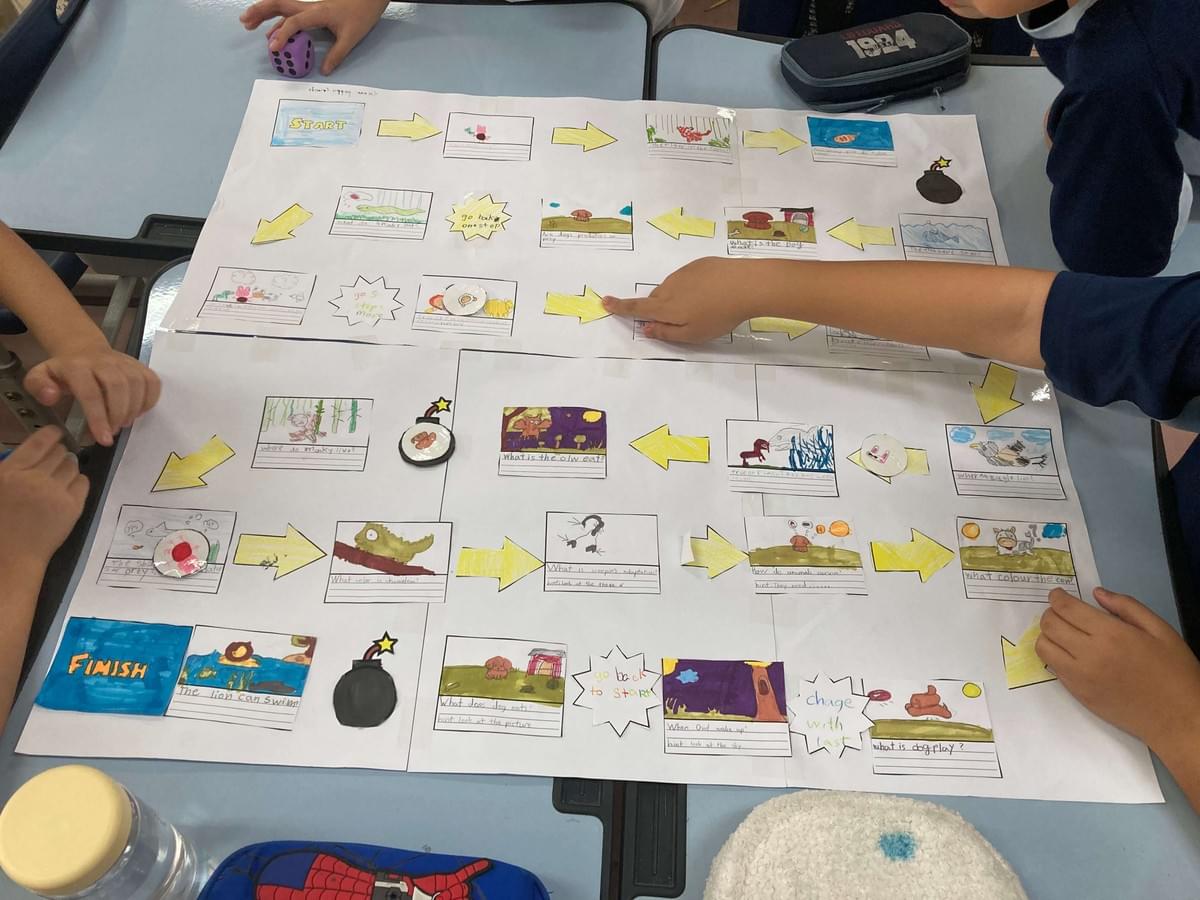
Over five lessons, students work together to create their own board game based entirely on what they've just learned. They write the questions, decide how the game should work, design the board, make the playing pieces and then spend the final lesson playing their games.
On the surface, it feels like an art project with a bit of friendly competition thrown in. In reality, students are revisiting unit content over and over again. They have to decide which topics are important enough to include, explain their thinking to teammates, improve one another's questions and repeatedly discuss the unit while making decisions together. By the time they finally sit down to play, they've already revised far more than they realise.
The project also fits perfectly with cooperative learning methods. Every lesson is designed to encourage discussion, shared decision-making and equal participation, while the simple cooperative learning structure of Roving Reporter can be integrated to keep fresh ideas moving around the classroom throughout the week. Instead of teams working in isolation, students regularly learn from one another, refining and improving their games as the project develops.
Although I usually run this project over five lessons at the end of a unit, it also works well as an end-of-term or end-of-semester review when you want students to look back over a larger body of work.
What You'll Need
One of the reasons I like this project so much is that it doesn't require lots of expensive resources. Most schools already have everything needed. All you'll need is:
- Sheets of A3 or A4 card or paper
- Sticky tape
- Coloured pencils or markers
- Scissors
- Glue
- Dice
- Counters (or students can make their own)
How the Week Is Organised
I spread the project across five lessons so students have enough time to gain some meaningful skills and learning, and improve their ideas. The week follows a simple structure:
Day 1: Brainstorm and write review questions in pairs
Day 2: Teams select the strongest questions and create the question cards
Day 3: Design and build the board game
Day 4: Finish the game board and decorate it
Day 5: Play the finished games
Every lesson begins with exactly the same routine.
Rather than giving the instructions for the days task and asking, "Does everyone understand?", I use a simple cooperative learning Instruction Checking Question (ICQ) routine that gets every student explaining the task before they begin.
Students first take turns to explain the activity to their face partner, and then to their shoulder partner. Finally, I use the numbered heads structure to randomly ask a few students around the room questions about the task before anyone starts working.
It only takes a couple of minutes, but it almost completely removes the confusion that often appears a few minutes into an activity. Here's how it works:
Step 1: Teacher explains the task
Step 2: Using a Timed-Pair Share, learners take turns to explain the task again to their Face Partners
Step 3: Using a Timed-Pair Share, learners take turns to explain the task to their Shoulder Partners
Step 4: Teacher uses the Numbered Heads Together structure to randomly call on students from various teams around the classroom as a final check on understanding
Step 5: Students begin the day's task
Day 1 – Writing the Questions
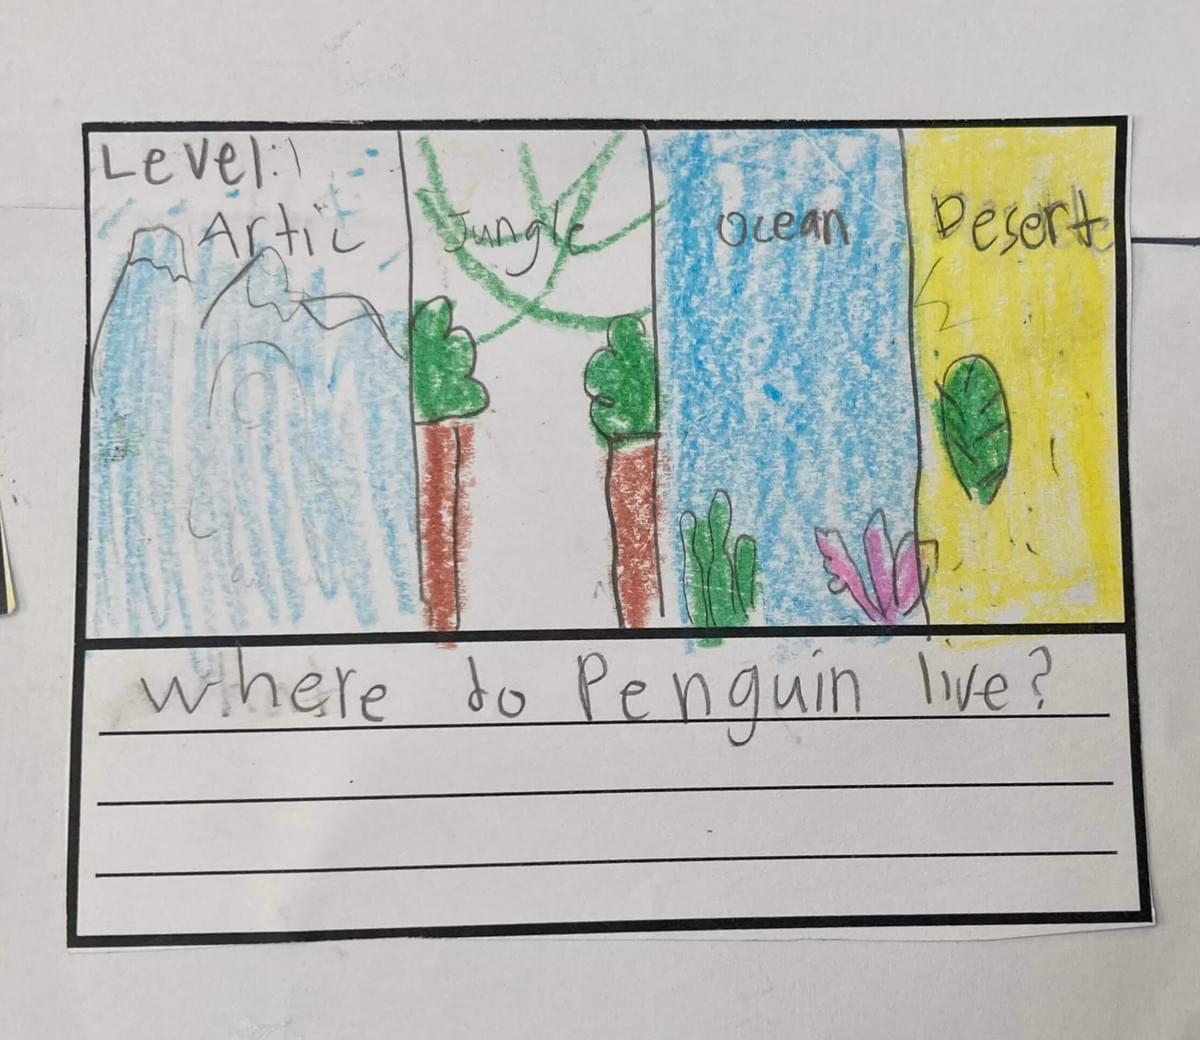
The first lesson is all about creating good questions. Because the quality of the finished game and its effectiveness as a unit revision tool depends almost entirely on them.
Begin by putting students into pairs rather than full teams. Smaller groups usually generate more ideas and it's much easier for everyone to meaningfully and effectively contribute.
Their first job is simply to think back through everything they've learned during the unit and make a list of the topics and ideas for questions they could possibly include in the game.
Once they've refreshed their memories, they begin turning those ideas into questions. I encourage them to take turns writing a mixture of question types, with one student writing and the other coaching them as they do so.
At this point, you can give them some examples or questions structures to follow if they need it, such as "True or False...", "What colour is...", "Where do you...", or "Name three things..." etc.
I tell each pair to write as many questions as they can - and at least eight to ten. That gives every team plenty of material to work with later in the week.
Once every pair has a good collection of questions, I like to implement the Roving Reporter structure, and one student from each pair visits another pair for a couple of minutes.
Their job isn't to copy questions but to collect ideas. They might notice a clever way of wording a question, a different question format or a topic their own pair has forgotten to include.
Then reporters return to their original partner and discuss what they've discovered. They then make any tweaks and improvements, or add new questions to the the one they have written already.
By the end of the lesson, every pair has a strong set of questions ready to present to their team tomorrow, and thanks to Roving Reporter, those questions are usually much stronger than when the lesson first began.
Day 2 – Making Question Squares
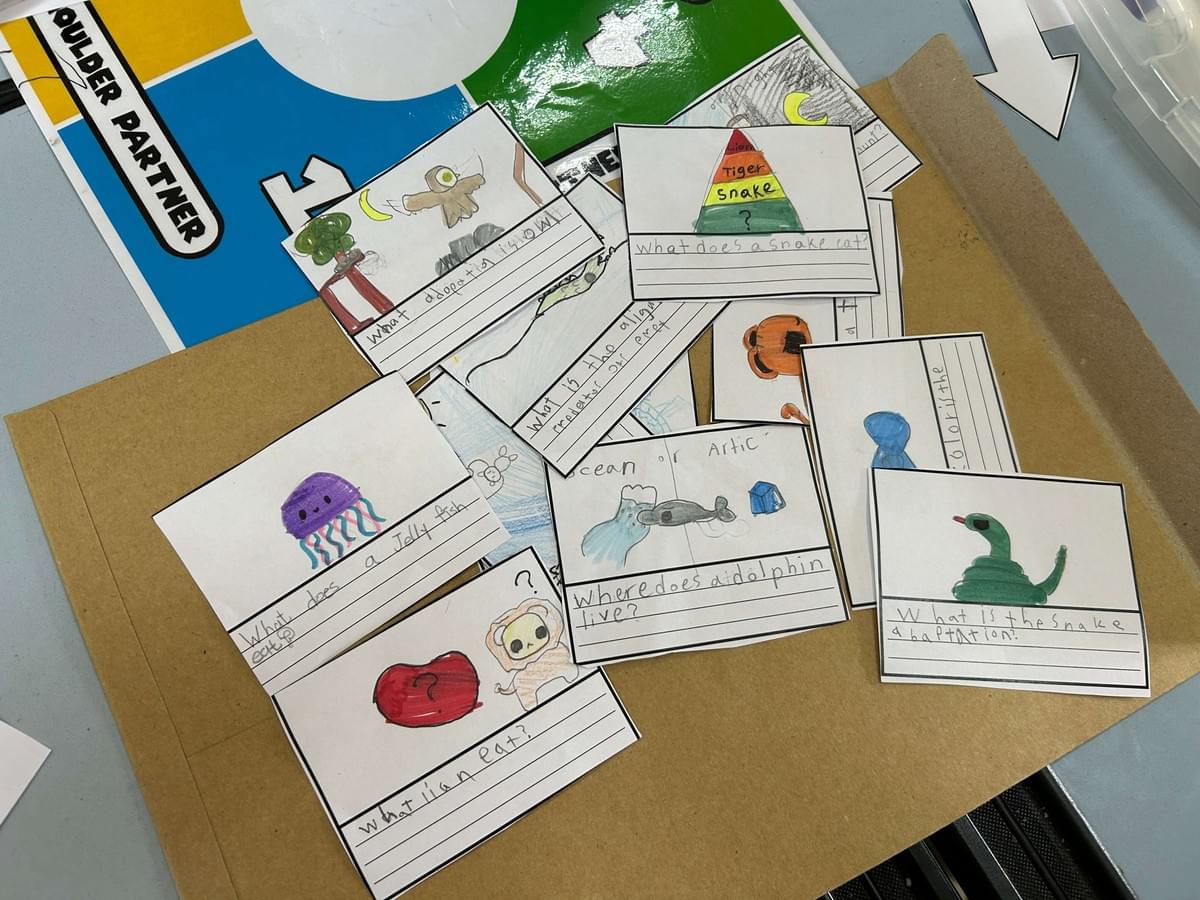
The second lesson is where the project really starts to feel collaborative. Yesterday, students worked in pairs to generate as many good questions as possible. Today, those pairs come back together as their original team of four and begin the difficult job of deciding which questions deserve a place in the final game.
I always remind students that this isn't a competition between pairs. They're not trying to prove whose questions are best. They're trying to build the best game they can.
Each pair takes turns reading through the questions they wrote the previous day, explaining anything that might not be clear. The rest of the team discusses each one before deciding whether it should be included.
One rule I always insist on is that every pair should have at least four of their questions included. It helps every student feel ownership over the finished game while still encouraging teams to choose the strongest questions overall.
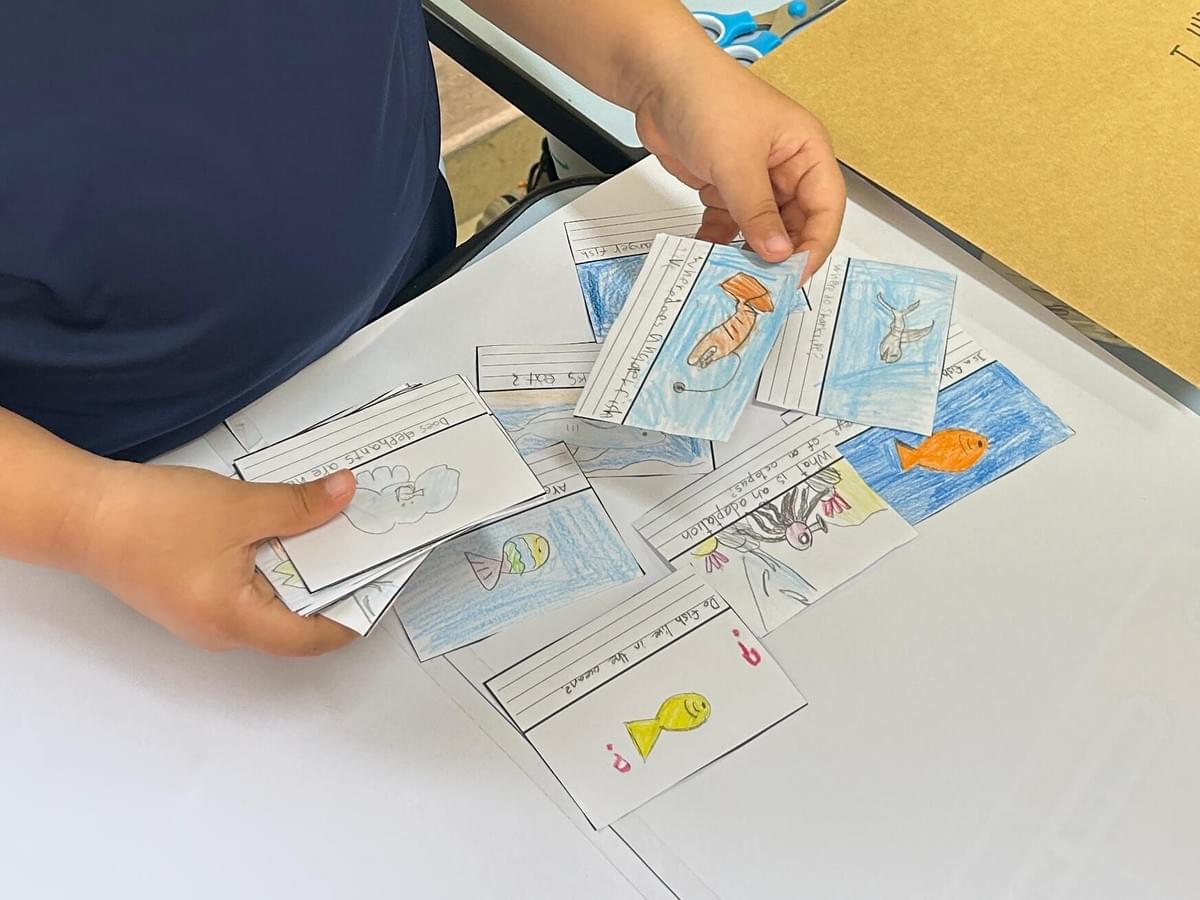
Once the final selection has been made, students begin rewriting the questions and illustrating them neatly onto individual question squares which I have printed and ready to go.
I have a set of everything needed ready to hand out to each team, which includes questions squares, direction arrows, start and finnish squares, power-up squares, and bombs. Each team gets one set to work with and starts cutting out the squares, ready to write and illustrate their chosen questions on.
Before the lesson ends, I use Roving Reporter again. This time, one student from each team visits another group to see which questions they selected and how they are being illustrated.
It energises the room, and students almost always come back with new ideas to improve their own questions and drawings.
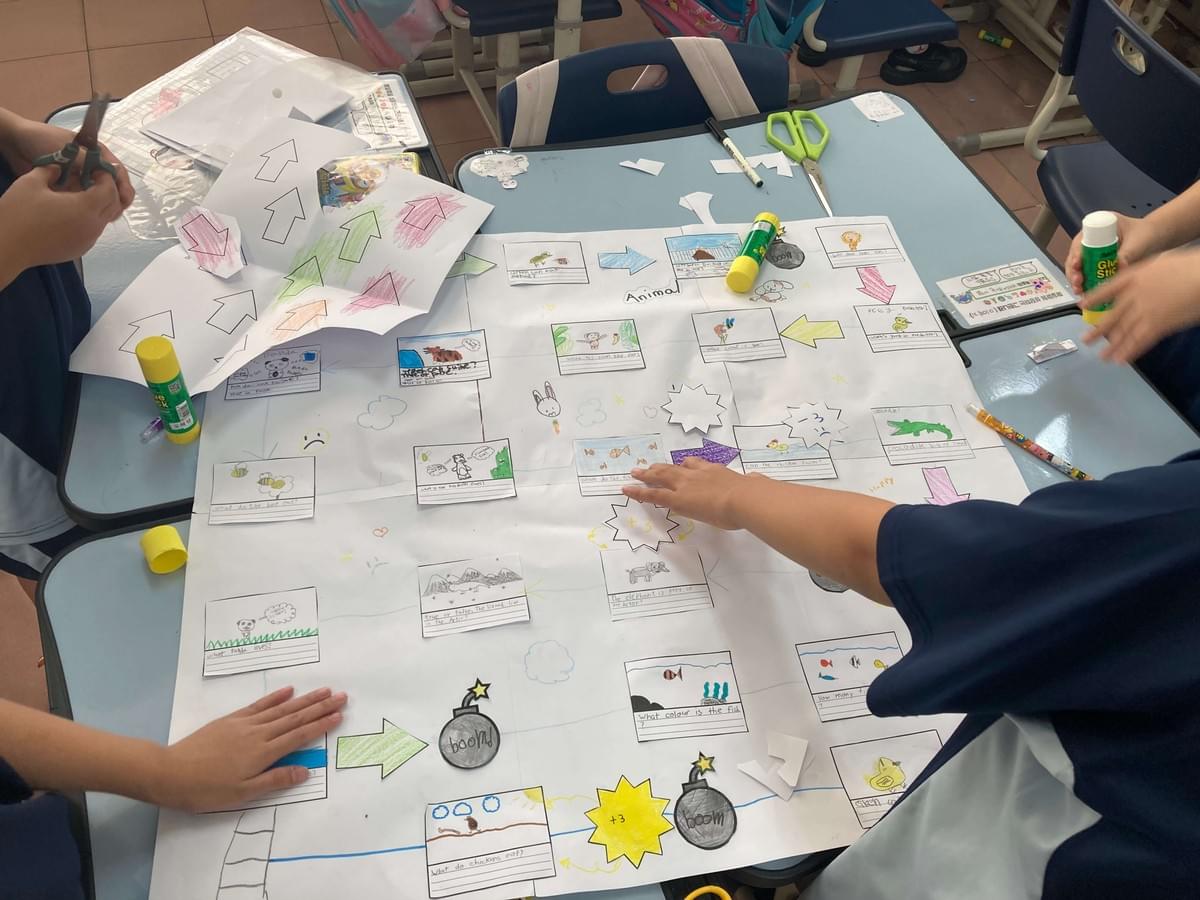
Day 3 – Building the Board
Now comes the part everyone has been waiting for. With the questions finished, students can finally start building the game itself.
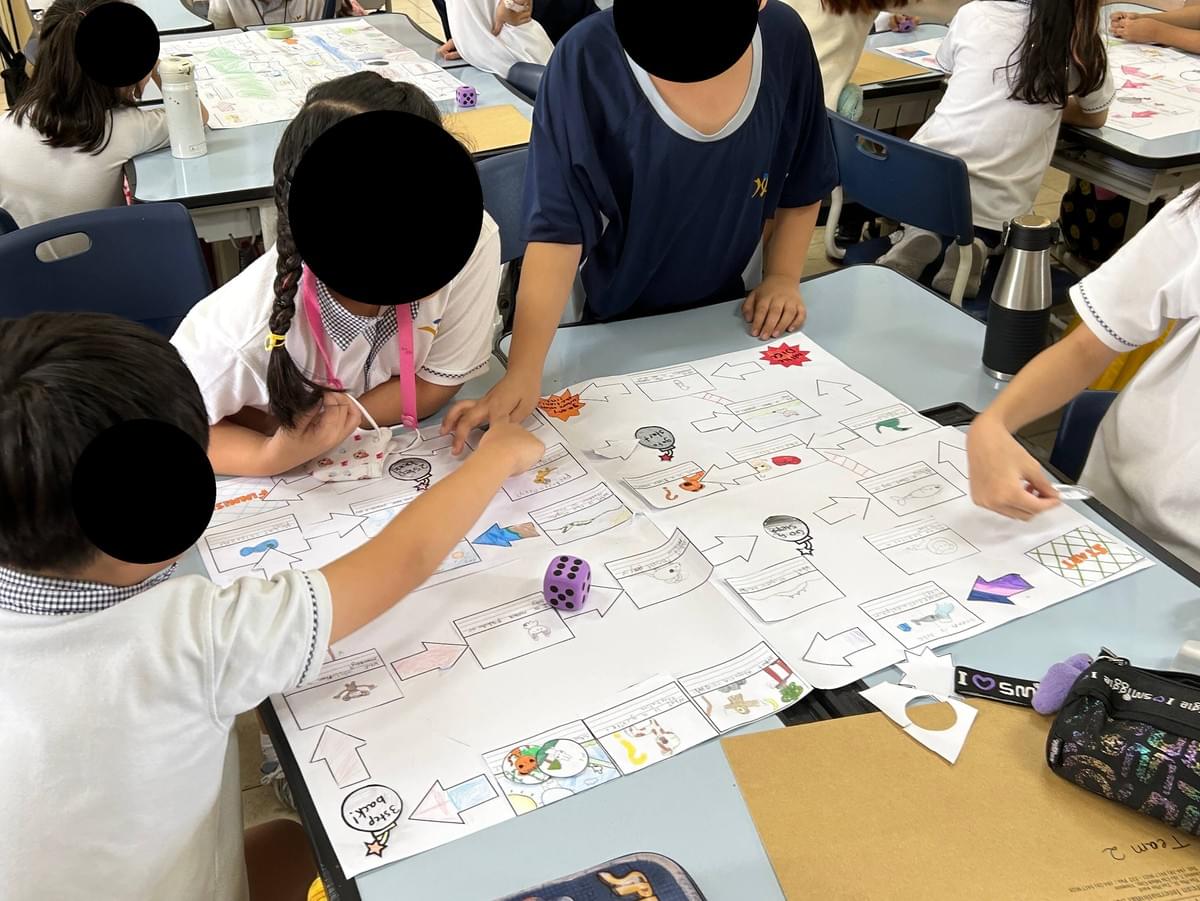
Using sticky-tape, they stick together sheets of 6 sheets of A4 paper (or 4 sheets of A3) to make their board. Then, they start sticking their question square and direction arrows in place.
Together they decide how the game will work. Will the path wind across the page or spiral towards the centre? Where should the question spaces go? Should there be shortcuts, bonus turns, traps or bomb spaces that send players backwards?
I show them a slide of how a game might look (question square - arrow - question square - bomb -etc.), and include an example layout in their pack. But then I leave it up to them, because the variety of ideas is one of the things that makes the final lesson so enjoyable.
Some teams choose themes connected to the unit, while others invent completely original ideas.
To keep everyone involved, I usually give each student a responsibility. One student might sketch the path while another writes the question numbers. Someone else colours any artwork not finnished the day before, while another organises the materials.
The roles don't need to stay fixed, but giving everyone an initial responsibility stops the stronger personalities taking over the whole project.
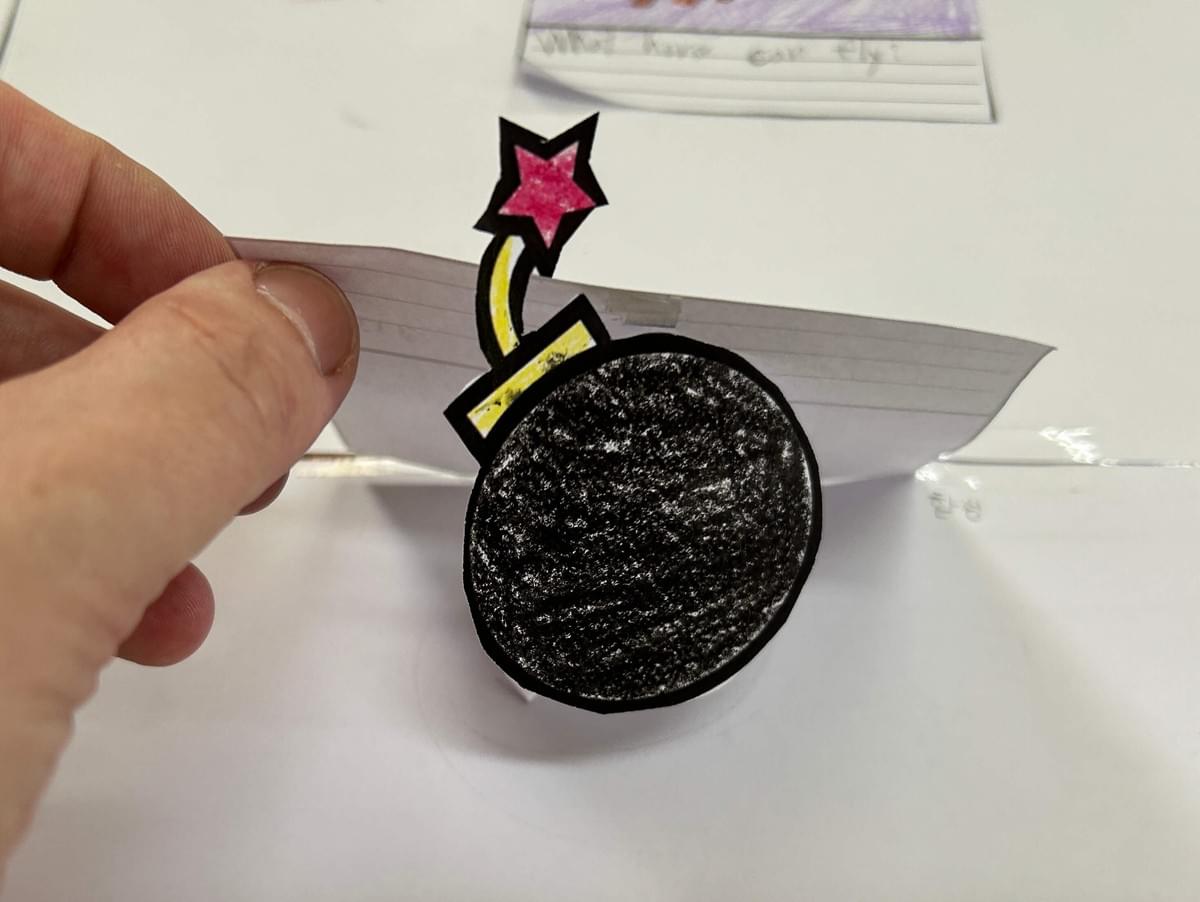
Question Square With Pop-Up Bomb: One team's idea that proved popular during a round of Roving Reporter, and was subseqently utilised in other teams' games.
About halfway through the lesson, I stop everyone for another round of Roving Reporter. This is one of my favourite uses of the structure because students return absolutely bursting with ideas.
One team might have created a brilliant shortcut. Another has invented a clever challenge square. Someone else might have used a completely different layout that inspires half the class.
Within minutes the quality of every board improves because the best ideas spread naturally around the room.
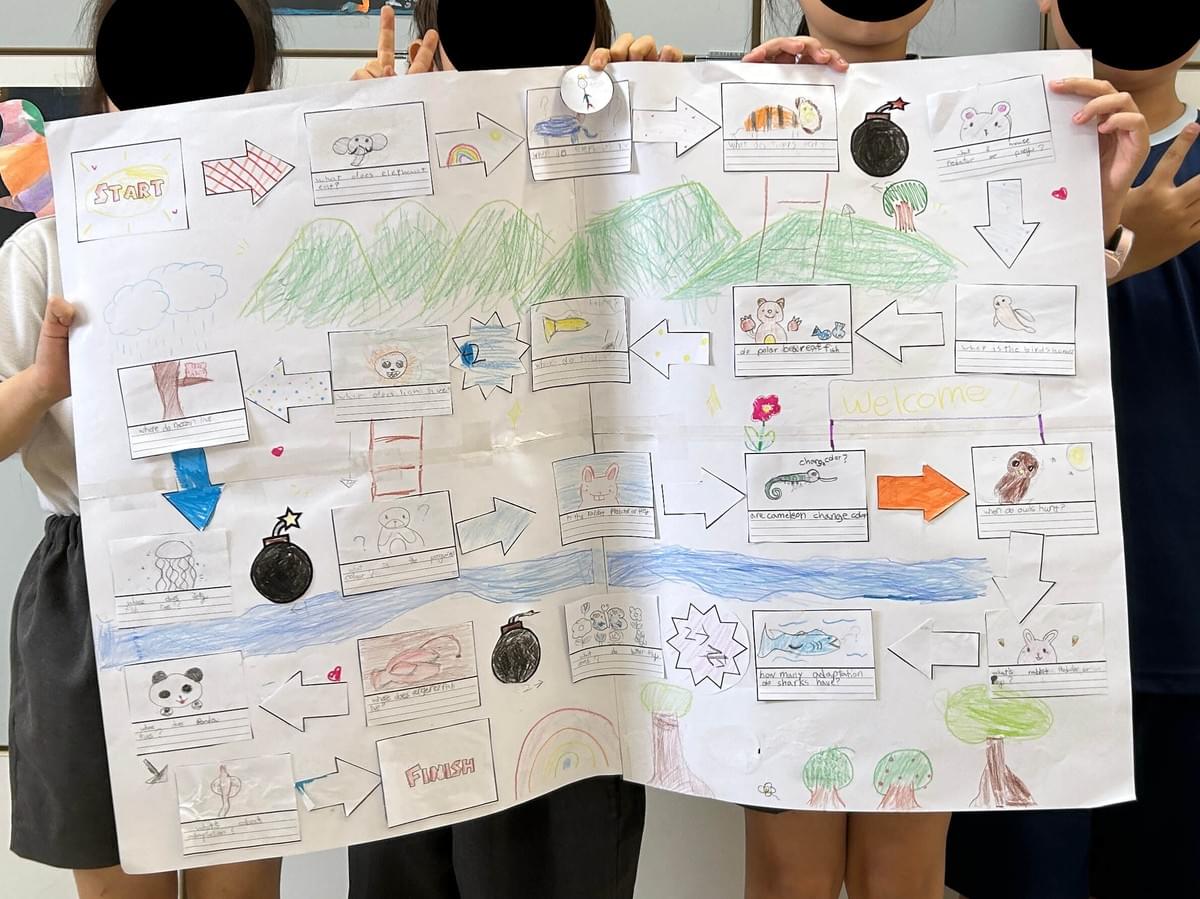
Day 4 – Decorating the Board
By the fourth lesson, the board games are usually all nearly finnished with question squares glued in place. So its time for students to start decorating their board and thinking about the overall look.
Some groups will still be adding the last few question and tidying things up, while others will be colouring and decorating the board itself and creating their player counters.
If it's a unit on animals, they might decorate the board to look like a zoo or jungle. And if they're reviewing a unit on holidays and travel, they might decorate it to look like an airport or beach.
Towards the end of the lesson I use Roving Reporter one final time. One student visits another team, looks carefully at their finished game and asks a few simple questions.
The reporter returns with suggestions, and teams spend the last few minutes making any final improvements. Also, I always make sure that a different student is the reporter every day of the project. So by day four, everyone in each team has had a chance to visit other teams.
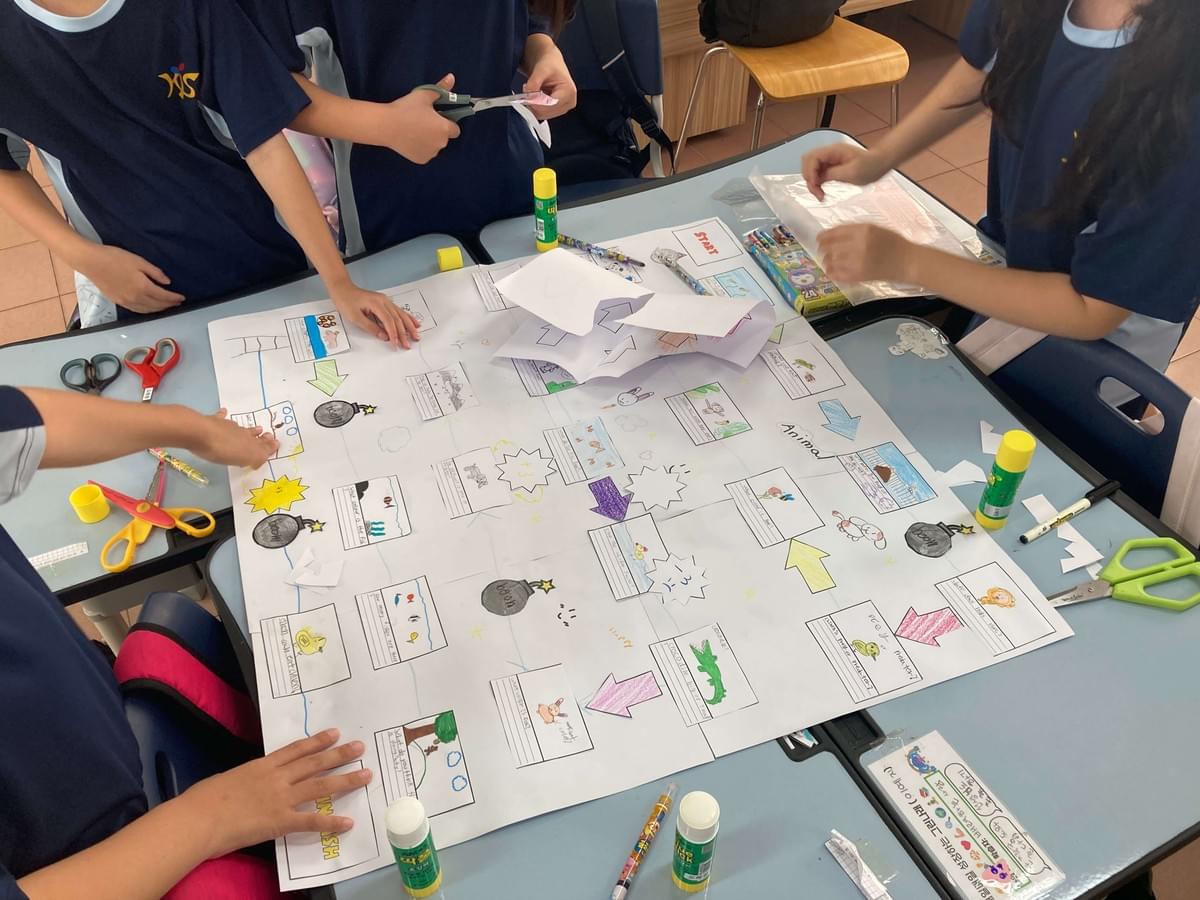
Day 5 – Game Day
After four lessons of planning, discussing, designing and improving, students finally get to play the games they've created.
There are lots of ways to organise this, but I've found two methods work particularly well.
The first is very simple. One player rolls the dice and moves their counter. They count the other team in ("1... 2... 3... "), and the rest of the team reads the question aloud together in chorus before the player answers it.
This approach works well with younger learners because everyone gets repeated reading practice throughout the lesson.
The second version has gradually become my favourite because every student has a role on every turn. One player rolls the dice and moves, the next player reads the question, the third player checks the answer and praises or coaches the response if necessary, while the fourth player manages the cards or keeps the game organised. After every turn the roles rotate naturally around the table.
It sounds like a small difference, but it transforms the atmosphere. Nobody spends long periods waiting for their turn because everyone is actively involved all the time.
Once teams have played for fifteen or twenty minutes, I usually ask pairs to swap games with another table, leaving one pair behind to be the "Games Masters".
Students love seeing what other groups have created, and it's often at this point that they realise just how differently each team approached exactly the same task.
Final Thoughts
Although students remember this as "the board game project", it's so much more than that. There's a lot of team building, class building, diplomacy, and conversation while making it. There's debate about which questions were worth including, and they borrowing ideas from other groups through Roving Reporter, solving problems together and finally seeing another team enjoy something they created.
That's why I keep coming back to this project every year. Yes, its fun and the finished games look fantastic, but the real value isn't the board game itself. It's everything the students have to do in order to create it.
So if you're looking for an end-of-unit project that feels creative without losing sight of the learning, I'd encourage you to give this one a try. To save time, you'll find everything you need right here, in our Build Your Own Boardgame Kit. Or simply make your own components.
It takes a little longer than a traditional revision lesson, but in my experience the extra time is more than repaid by the quality of the discussions, the level of engagement and, most importantly, how much of the learning students actually retain afterwards.
If you decide to try it, I'd love to hear how your class gets on in the comments section below.